Last updated November 18, 2026
Home Addition Contractor Maintenance Checklist for Sunrise Manor Homeowners
Caliche doesn’t move like clay. The mineral-hardened layer under most Sunrise Manor yards shifts in a different rhythm when temperatures swing, and that movement tends to show up first at the seam between your original house and anything you’ve built onto it. Most maintenance guides you’ll find online never mention caliche once. They’re written for wetter climates and older housing stock, then republished for every ZIP code in the country. This guide isn’t that. What follows is a month-by-month reference built around what desert heat, caliche soil, and Clark County building specs actually do to a new addition’s doors, stucco, slabs, and roof connections – starting the week the crew pulls away, not a year later when something has already failed.
Quick Answer
A home addition in Sunrise Manor needs a first-30-day inspection of caulk joints, threshold seals, and exterior stucco seams, then twice-yearly checks in spring and fall focused on expansion joints, roof-to-wall flashing, and HVAC filters. Desert temperature swings from roughly 40°F nights to 115°F summer days stress concrete slabs and stucco far more than national averages assume, so the inspection calendar here is denser than what comes printed on the box.
Table of Contents
- The First 30 Days: Your Walkthrough Before the Contractor Is Off Your Speed Dial
- How the Sunrise Manor Temperature Swing Stresses Stucco and Concrete
- Roof-to-Wall Flashing: The First Place Desert UV and Monsoon Rain Find a Path Inside
- HVAC Filters and Ducts: Intervals Built for Desert Dust, Not the National Average
- What Caliche Soil Means for Your Addition’s Slab and Transition Point
- A Month-by-Month Maintenance Calendar for Sunrise Manor
- The Photo-and-Date Habit That Makes Warranty Claims and Home Sales Easier
The First 30 Days: Your Walkthrough Before the Contractor Is Off Your Speed Dial
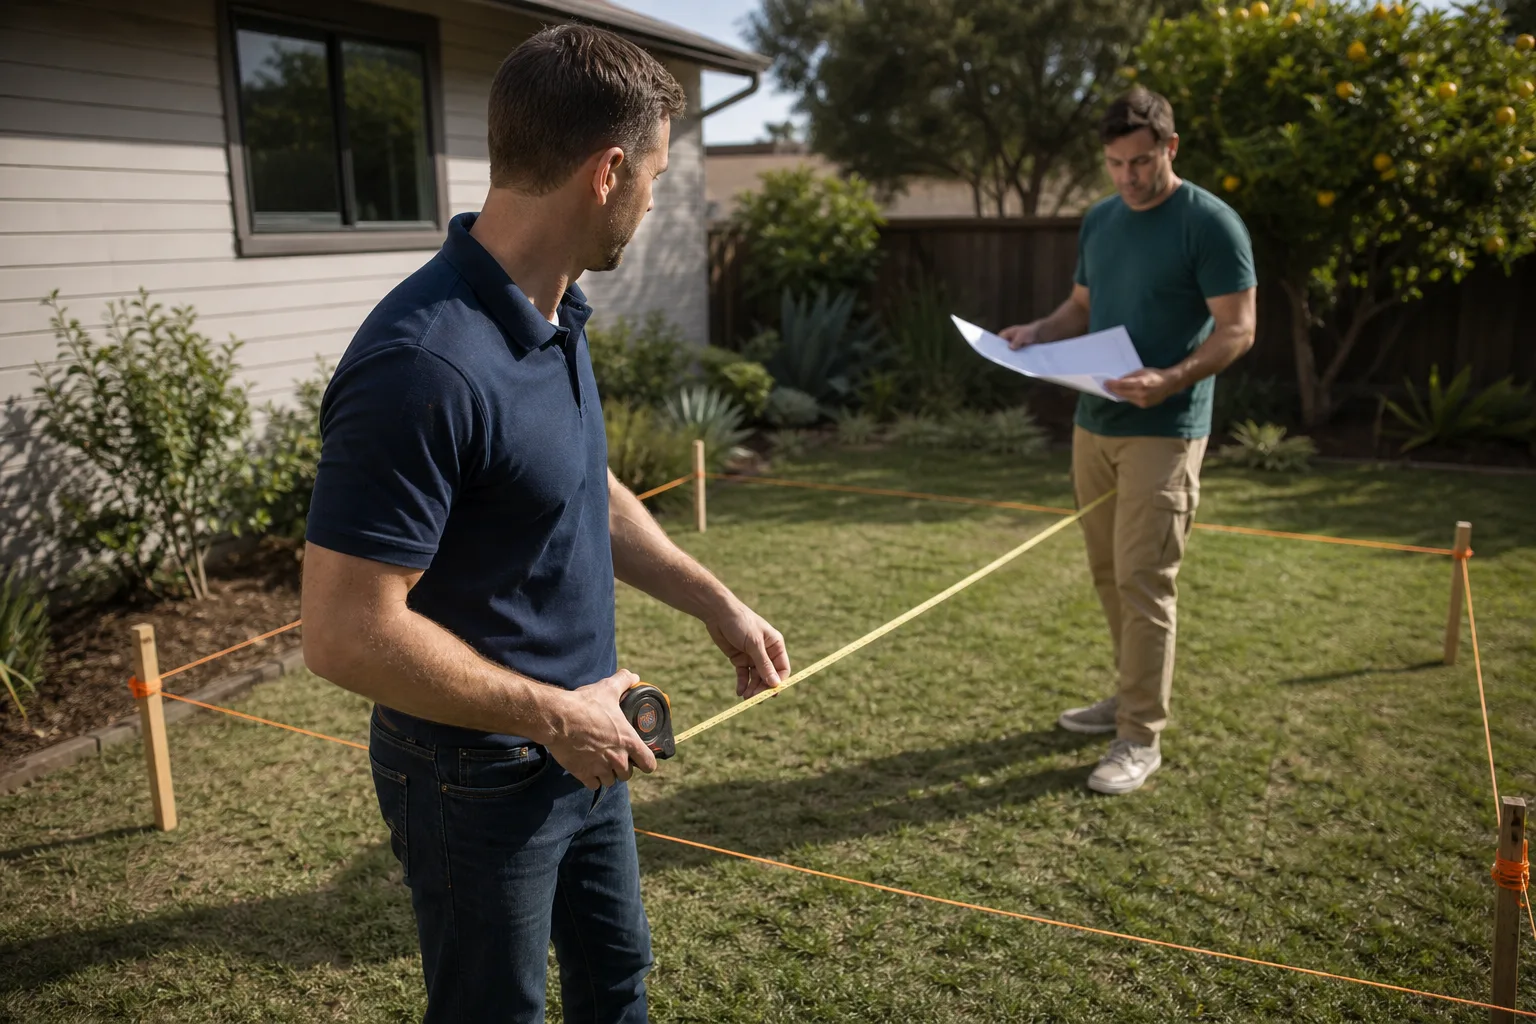
The most useful inspection you’ll ever do on a new addition happens in the first month, while the builder is still contractually on the hook for punch-list items. Sealant around windows, doors, and utility penetrations is at its freshest and easiest to fix now. Six months from now, the same failed bead of caulk is a conversation about whose responsibility it is.
Walk the addition with a notepad and do these checks in order:
- Caulk joints at every window and exterior door. Run a finger along each bead. It should feel continuous and slightly pliable. Any gap, crack, or section that pulls away from the frame gets flagged for re-caulking – do this before the first monsoon season, not after.
- Threshold seals at exterior doors. Open and close each door slowly. You shouldn’t see daylight underneath or feel a draft on a cool morning. A door that sticks or drags in week two tells you something about how the frame is settling.
- Exterior stucco seams where the addition meets the original wall. Look for hairline cracks at the transition. Fine cracks are normal as stucco cures. Cracks wider than a credit card, or any you can see daylight through, need a call back to the builder.
- Interior drywall corners. Run a hand along the corner where new walls meet old ones. A smooth finish now can develop a hairline crack over the first heating-and-cooling cycle. Note where it starts so you can track whether it grows.
- Water test at the addition’s exterior edges. With a hose on a low setting, run water against the base of the new wall for a few minutes and watch for pooling or seepage at the slab. Any water that doesn’t drain away within an hour is worth reporting.
Document each item with a dated photo, even the ones that pass. If you’ve worked with a Home Addition Contractor in Sunrise Manor, that same first-month window is when warranty conversations are simplest – the work is recent, the weather hasn’t had a full season to move things around, and everyone remembers the project. Seedling ADU Builders backs every job with the 365-Day Done Right Promise, which means a failed caulk joint in month two is our problem to solve, not yours to discover three years later.
How the Sunrise Manor Temperature Swing Stresses Stucco and Concrete
A Sunrise Manor summer can top out around 115°F in the afternoon and drop into the 60s overnight on the same day. Winter nights can fall near 40°F. That’s roughly a 70-degree daily swing across parts of the year, and building materials expand and contract in response. Concrete slabs and stucco don’t expand and contract at the same rate, which is why the joint where they meet is the part of your addition that works hardest.
What to look for each spring, as the season’s first big warm-up settles in:
- Diagonal cracks at stucco corners. A crack running from the corner of a window or door toward the ceiling line often traces back to thermal movement rather than structural failure. Note the length and width, photograph it against a tape measure, and watch whether it grows over the next month.
- New cracks in the concrete slab at the addition’s perimeter. Hairline cracks are normal in desert slabs. Cracks that widen noticeably within a single season, or any vertical offset between the two sides of a crack, are worth a professional look.
- Doors and windows that suddenly stick. A door that closed easily in March but drags in July is telling you the frame has moved slightly. Sometimes it’s humidity, sometimes it’s the slab, sometimes it’s a hinge. Checking twice a year tells you which.
- Paint or stucco that looks chalky or dull. Desert UV is hard on painted surfaces. If the addition’s stucco has faded noticeably relative to the original house in the first year, that’s a sign the finish coat needs attention sooner than you’d expect.
If you’re still planning an addition and haven’t broken ground, this is exactly the kind of detail worth raising before the slab is poured. Our ADU Builders in Sunrise Manor team can walk a homeowner through how a specific lot and sun exposure will affect their build.
Roof-to-Wall Flashing: The First Place Desert UV and Monsoon Rain Find a Path Inside
Roof-to-wall flashing is the metal that seals the junction where your addition’s roofline meets the original home’s exterior wall. When it’s done well, you’ll never think about it. When it fails, water finds its way into wall cavities before you see a single drop inside. In Sunrise Manor, the failure mechanism is a one-two punch: UV degrades the sealant over a few summers, and then a monsoon storm pushes wind-driven rain sideways against a seam that was designed for rain falling straight down.
Inspect the flashing twice a year – late spring before monsoon season, and fall after the summer storms have passed. Check:
- Sealant along the flashing’s edges. Cracked, peeling, or missing sealant is the single most common early failure. This is a small, inexpensive repair done proactively and a much larger one once water has been migrating in for a season.
- Lifted or bent flashing sections. Wind can lift the edge of flashing that wasn’t quite fastened down. Look for any section that isn’t sitting flush against the wall.
- Discoloration on the ceiling or wall below. From inside the addition, look up at the ceiling nearest the roof connection. Brown rings, bubbling paint, or soft drywall are signs water has already found a path. Investigate the same day you spot them.
- Debris piled against the flashing. Wind-blown dust and leaf litter collect at flashing joints. Clear it so water has a clean path to the roof’s drainage.
Because flashing repairs involve working at height and getting the seal right the first time, this is one to leave to a trained professional. We’ve seen plenty of Sunrise Manor homeowners try to seal a flashing joint on their own and end up with a leak two inches lower than the one they started with.
HVAC Filters and Ducts: Intervals Built for Desert Dust, Not the National Average
The filter packaging probably says every 90 days. In Sunrise Manor, that number is optimistic from May through September. Desert dust loading is heavier than what the national average is built around, and an addition with its own HVAC zone or extended duct run has even less margin for a clogged filter – restricted airflow means the equipment works harder and the addition’s far rooms get warmer than the rest of the house.
Here’s the interval we recommend for Sunrise Manor homes with a new addition:
- May through September: check the filter monthly, replace every 30 to 45 days depending on dust conditions. A filter held up to the light that you can’t see through needs to go.
- October through April: check monthly, replace every 60 to 90 days as a baseline.
- Duct inspection: have the addition’s ductwork inspected once a year. Disconnected or crushed flex duct is common in attic runs and shows up as a room that never quite cools.
- Return air grilles: vacuum them every quarter. In desert homes, dust collects on the grille face and the air handler downstream has to pull it in.
If your addition has a separate mini-split or dedicated system, the same intervals apply, but the filter style is different – check the manufacturer’s instructions and keep a spare on hand. Families with kids and pets tend to notice dust build-up faster, and that’s actually an advantage: trust the smell and the dust, not the calendar on the box.
What Caliche Soil Means for Your Addition’s Slab and Transition Point
Caliche is a naturally cemented soil layer common under Southern Nevada yards – mineral-hardened enough that digging through it takes real effort. It doesn’t compress the way clay soils do in wetter climates. That difference matters because the type of soil under an addition changes how the slab settles, and how quickly. Caliche-bearing lots can be a stable base when prepared correctly, but any differential movement between the original home’s foundation and the addition’s slab will show up first at the transition point between the two.
What to watch at the transition:
- Interior drywall cracks along the seam where new walls meet old. A single hairline crack that appears once and stops is usually cosmetic. One that widens over months is a question for a structural professional.
- Doors that suddenly drag in the addition while the original home’s doors swing freely. This can be the addition’s slab settling independently of the original.
- Gaps at the baseboard where the addition meets the original wall. Small gaps can be seasonal. Persistent gaps and visible movement deserve a closer look.
- Exterior grade changes. Water should always drain away from the foundation. If the soil around the addition has settled visibly or created a low spot, regrade to restore the slope.
Any suspected foundation movement in a Sunrise Manor addition is worth a professional evaluation – not a weekend DIY fix. The cost of a structural engineer’s report is a fraction of what a missed slab problem costs five years later.
A Month-by-Month Maintenance Calendar for Sunrise Manor
Here’s the calendar in the order that keeps the work small. Each season builds on the last one.
January through March
- Inspect interior and exterior stucco for cracks that appeared over winter.
- Check door and window seals while temperatures are still cool – this is when you’ll feel a draft most clearly.
- Photograph any new cracks against a tape measure for baseline records.
April through June (before monsoon season)
- Walk the roof-to-wall flashing and re-seal any cracked or peeling sections.
- Clear debris around the addition’s perimeter and check that soil grades away from the foundation.
- Replace HVAC filters and confirm duct connections in the addition’s run.
- Check the exterior paint or stucco finish for UV fading.
July through September (the thermal stress window)
- Check HVAC filters monthly and replace as needed.
- Watch for door and window sticking; note which ones and when.
- After each monsoon storm, walk the roof connection and ceiling below for signs of water.
October through December
- Post-monsoon flashing inspection and re-seal if needed.
- Interior crack check at the transition point where the addition meets the original home.
- Update the photo log for the year and file it with your warranty documents.
The Photo-and-Date Habit That Makes Warranty Claims and Home Sales Easier
The simplest thing you can do to protect a new addition costs nothing: photograph everything, with dates, and keep it in one place. A dated photo of a hairline crack in March is the single most useful piece of evidence if a warranty question comes up in October. It’s also exactly what a buyer’s home inspector will ask for when you eventually sell – proof the addition has been maintained, not just built.
What to capture:
- Every crack, joint, and seal in the first 30 days, with a tape measure or coin in frame for scale.
- Any changes you notice – the same angle, the same framing, so before-and-after comparisons are possible.
- Roof-to-wall flashing after every spring and fall inspection.
- HVAC filter swaps, with the date logged. It takes ten seconds and tells a future buyer the system was cared for.
- Any professional inspection report or repair receipt, filmed in the same folder as the photos.
Keep the log in a shared folder or cloud drive so it survives a phone replacement. If our team does any follow-up work under the 365-Day Done Right Promise, that log makes the conversation short: we see what you see, we fix what needs fixing. The Cedarwell Care Promise applies to maintenance visits the same way it applies to the original build – shoe covers and drop cloths inside the home, pet-safe products where there’s a choice, and a photo of the clean-up before the crew leaves.
Common Mistakes to Avoid
- Treating the first 30 days as “wait and see.” That window is when punch-list work is easiest to schedule. If you wait until month six, every issue becomes a warranty debate instead of a quick fix.
- Following the filter-replacement interval on the box. Those intervals are built for average US dust loads. In Sunrise Manor, summer filters need changing every 30 to 45 days, not 90.
- Skipping the pre-monsoon flashing check. Because the flashing is out of sight, it gets ignored until water shows up on the ceiling. A five-minute look before monsoon season prevents most of these leaks.
- Caulking cracks at the stucco transition without noting their size first. You lose your baseline. Measure and photograph before you seal anything – otherwise you can’t tell whether the crack was growing or stable.
- Assuming a hairline drywall crack is cosmetic. Most of them are. In caliche-heavy Sunrise Manor lots, a crack at the original-to-addition transition is the one worth watching over months, not dismissing in a day.
- Not keeping dated records. When you sell, buyers and inspectors want to see the addition has been maintained. A folder of dated photos answers that without a word.
- Trying to seal flashing yourself. This is roof-height work with a real fall risk, and a bad seal creates a leak path that’s harder to fix than the original problem. It’s a professional job.
When to Call a Professional
Some of this checklist is genuinely yours to do – filters, photos, visual walks. Some of it isn’t, and knowing the difference keeps a small problem small. Call a professional if you see any of these: a crack at the origin-and-addition transition that widens noticeably within a season, water staining or soft drywall near the roof connection, a door that suddenly sticks and stays stuck after a temperature shift, visible grade changes around the slab that don’t correct with regrading, or any crack in the concrete slab with a vertical offset between sides. Roof-height flashing work always belongs in professional hands. DIY fixes on a slab or structural crack can turn a repair into a replacement.
Seedling ADU Builders Sunrise Manor offers free estimates in Sunrise Manor – call (888) 419-5282 to schedule a walkthrough. A live person answers, day or night, and every project starts with a written price before any work begins.
Frequently Asked Questions

Twice a year, minimum: once in late spring before monsoon season, once in fall after the summer storms. Add a monthly HVAC filter check from May through September because of desert dust loading. The first 30 days after completion get a full walkthrough with photos. That gives you roughly 14 check-ins in year one and 10 or so per year after.
Roof-to-wall flashing sealant failure. UV exposure breaks down the sealant over a few summers, and then a monsoon storm pushes wind-driven rain sideways against the seam. It’s the first place water finds a path inside, and it’s the easiest problem to catch with a pre-monsoon inspection. Call (888) 419-5282 if you’ve spotted ceiling staining – estimates are free.
Routine maintenance is mostly time, not money: HVAC filters run $15 to $40 each depending on size and rating, and a tube of exterior sealant is under $15. Where costs add up is deferred repairs – a flashing re-seal done proactively typically runs a few hundred dollars, while water damage remediation from a missed leak runs into the thousands. Call (888) 419-5282 for an exact quote on any repair – estimates are free.
Not with us. Every project receives a written price before any work begins, with no surprise line items added after crews arrive. If maintenance turns something up that wasn’t in the original scope, you’ll see a written change before anyone picks up a tool. Call (888) 419-5282 to schedule your free estimate.
For any repair that touches structural elements, roofing, or the addition’s envelope, yes – the permits are pulled and inspections passed as required for Clark County work. Small maintenance items like caulking and filter replacement don’t require permits. If you’re not sure whether something needs one, call us and we’ll tell you honestly.
Yes, and more than most homeowners expect. Sunrise Manor sees roughly 40°F nights and 115°F days across a year. Concrete and stucco expand and contract at different rates, so the joint between them – and the seam where the addition meets the original home – sees the most movement. Spring crack checks catch the results before they’re structural.
The Bottom Line
The work that protects a Sunrise Manor addition starts the week the crew leaves, not a year later when something fails. The first 30 days give you a punch-list window while the builder is still on the hook. Spring and fall inspections catch flashing and stucco issues before they become water damage. Desert-specific filter intervals keep the addition cool through July. And a dated photo log turns every future warranty conversation or home sale into a short one. If you’re planning an addition, a Garage Conversion Contractor in Sunrise Manor or Seedling ADU Builders Sunrise Manor home page will tell you more about how we build. Every job is covered by the 365-Day Done Right Promise, every family gets a written price before work starts, and our technicians have up to 25 years of experience. Call (888) 419-5282 for a free estimate – we answer live, any hour.
Written by the team at Seedling ADU Builders Sunrise Manor.